Animal Footprint Cookies

My daughter recently baked some lovely cookies all by herself.  At the time my son was not interested in joining in, which was fine and I actually think my daughter enjoyed doing it by herself.  But after her cookies where a big success he started asking if he could bake his own cookies (and wonder why I can never lose weight).

I suggested a simple sugar cookie recipe and said he could choose animals to make footprints on the cookies.  He loved the idea – only problem was deciding which animals to use for the footprints – we opted for the let’s try as many animals as we can possibly find option.  Some worked well and some did not work that well, but it was all part of the fun.

Baking - making our animal fooprints

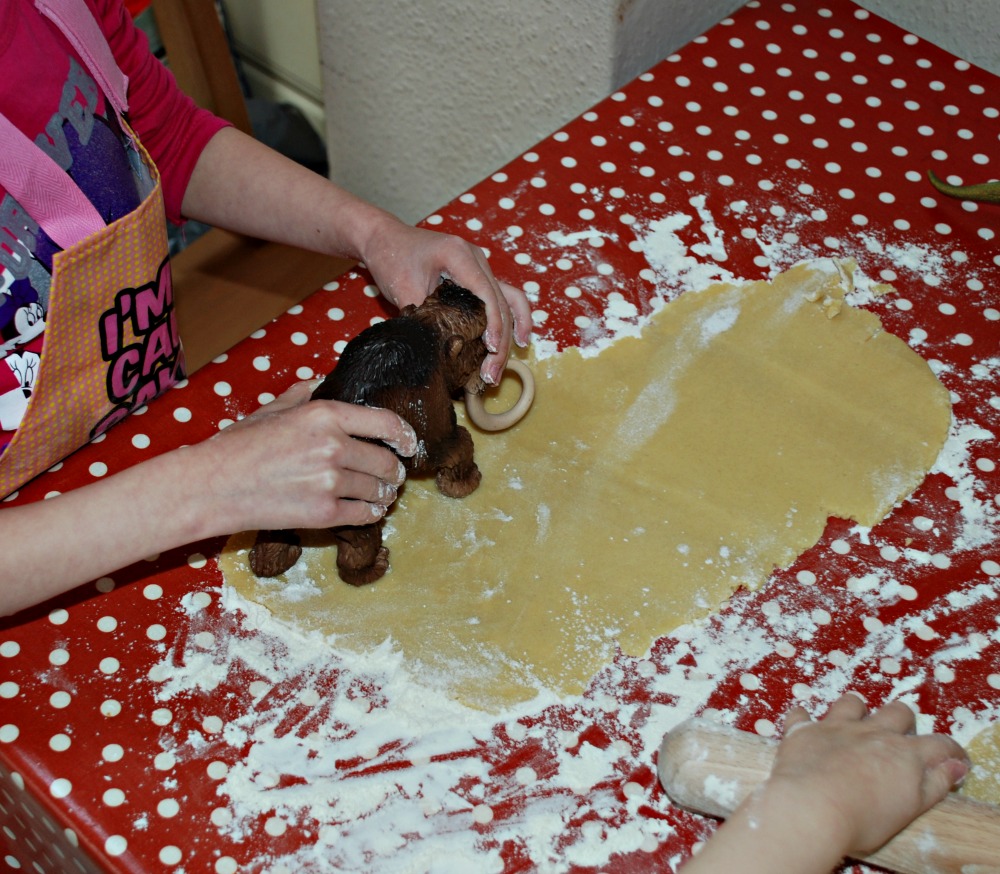
The kids did batch after batch after batch.  We would roll out our mixture, make the footprints and then redo the left over bits and made more and more biscuits.

Baking footprint biscuits ready to go into the oven

I have to admit I liked the look of the octopus biscuits.

Baking - footprint biscuits - using an octopus

baking - animal biscuits

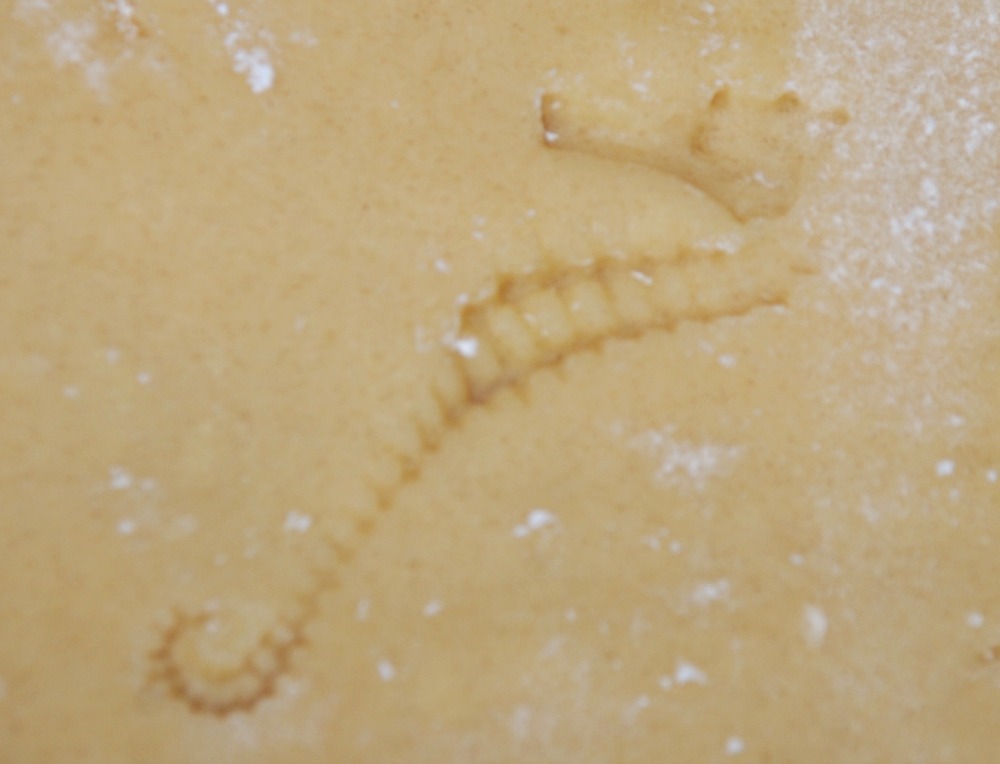
My daughter quite liked the seahorse one – although after it was baked it looked more like an animal fossil than a seahorse.

Baking - animal footprint biscuits seahorse


And big surprise but my little man loved the Dinosaur footprints and Big cat footprints (we are currently reading about all the different wild cats).

Baking - T-Rex footprint biscuits

baking- animal footprints using a toy lion

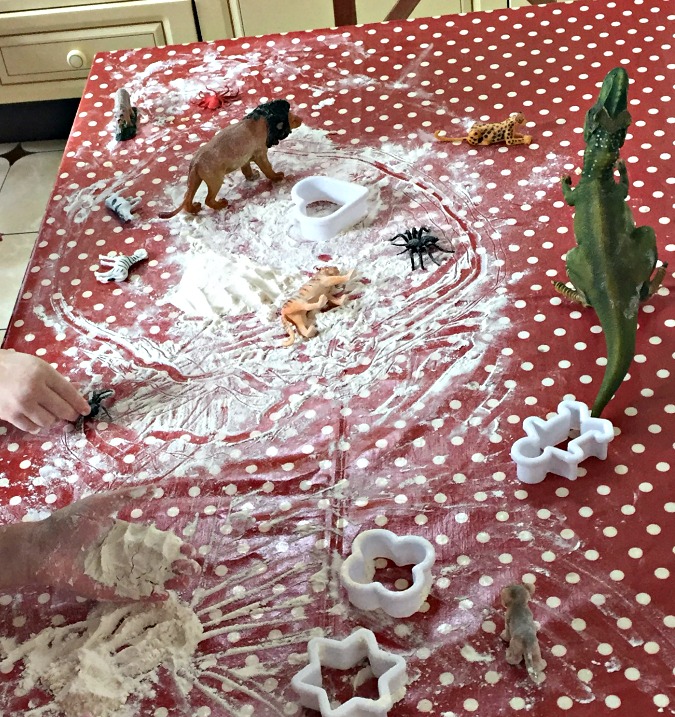
Afterwards the kids added some extra flour to the kitchen table and had a blast playing with the toy animals in the flour.  According to my son when you add flour to the tiger it makes it a Siberian Tiger.

Baking playing with the flour afterwards

Baking and playing with the flour afterwards

It was a very simple and easy baking session but it was just so much fun.  The kids really loved using their toy animals to make footprints in the biscuits.  And just to prove how much fun the kids had making these biscuits – one week on and we have already made another batch of the footprint biscuits.

Sometimes simple is better !!

Posted in Baking with Kids | Tagged , , , , | 2 Comments

Multiplication and Division Flower Learning Aids

Last year when my daughter was first learning her 3 times table we made this very simple 3 times table flower.  She loved the idea and she has since made a number of them.

multiple flower tracing over to make a flap

Flower times table with flaps

So it was not a big surprise when last week after a fun car drive trying to count in 11’s she made an 11 times table flower.

11 times table learning aid made with the flowers from Twinkl

While she was colouring in her flower I suddenly realised that it would be prefect for division as well as times table but with just a little tweak.  So we experimented first with a 2 times table flower and divided by 2 flower (we never made a 2 times table flower with our first round of flowers so she thought it would be fun to do one to add to her collection) and then a 5 times and divided by 5 flower.

We used the Multiple flowers from Twinkl as our base (it is Twinkl platinum).  With ours we used card but you could also print on paper.  We cut out the Twinkl flowers and then used them as a basic template to trace around and cut out an extra flower.

After you have coloured the extra flower in you need to write the numbers 1 to 12 on each petal (or you could use stickers, my daughter did one of hers with stickers but has since gone back to writing out the numbers).

Here is a photo showing how we put the 5 times table and divided by 5 flowers together.

Times table and division learning aid flowers made using Twinkl resources by the kids of ofamilyblog

For the times table flower  –

Cut the petals on the flower that you made so that the kids will be able to lift each petal up as a flap.  We cut down the side of the petals until we reached the middle circle of the flower.

Then you stick the extra flower that you made on top of the Twinkl flower but you only glue the center bit, remember to leave the petals free from glue.

With our times table flowers we actually added a large times sign on the top to indicate it was a times table flower.

For the division flower (you do the opposite) –

The extra flower that you make will be the flower underneath the Twinkl flower.  You will need to cut down the sides of the petals of the Twinkl flower (you always cut down the sides of the petals of the flower which is going to go on top).

You will stick the center of the Twinkl flower on top of the flower that you made – remember no glue on the petals as these are going to act as your flaps.

And if you want you can write a division sign on the top of your Twinkl flower.

2 times table and division by 2 learning aid

The idea with the flowers is that on the division flower the kids will say  4 divided by 2 = (lift the flap) and they can see the answer is 2.  Or on the multiplication flower 2 times 2 = (again lift the flap) and they can see the answer is 4.

Division learning aidMy daughter enjoys using these flowers.  I just need to think of a version of this for when my son gets to this stage………….

Multiplication and division learning aidWe have found that using white copier card works very well for activities like this – it is not as thick as normal card but a lot sturdier than normal paper – we normally buy this A4 card for our crafty activities / home-made learning aids – Lightweight White Card for Children to Use in All Types of Crafts 160 gsm (Pack of 100)


Save

Save

Save

Posted in ks1 maths | Tagged , , , , , , , | 43 Comments

Addition and Multiplication Home-made flip books

Simple addition flip book made to help kids practice at home found on ofamilyblog

Around two and a half years ago when my daughter was learning her basic CVC words we made one of those basic CVC word books – there are lots of them on Pinterest.  You basically buy a cheap flip notebook, cut the pages into three strips and write the letters on the different sections (with vowels in the middle). The kids then get to play around with the different sections and create words.  It was a great basic word activity.

So last week when we were revising some of her times tables I suddenly thought what about making her a multiplication booklet. Exact same concept but instead of letters we use numbers.

Multiplication flip book home-made on ofamilyblog

We made it the same way.  We cut the pages of a small notebook into three sections.  On the first section you write the number 0 to 12 with a x, on the second section you write the number 0 to 12 with  a = sign and on the last section all the possible answers.

Multiplication book

Very simple and a more hands on way for her to practice some multiplication sums.   She liked the fact that she could create her own sums and then find her own answers – she was in control.  And Big Bonus for me –  doing it this way she actually ended up practicing more multiplication sums that she would if she was given a worksheet.

I have now learnt that when one kid gets a fun learning aid the other generally asks for their own equivalent.  So I made  little man an addition booklet.

Making your own addition practice book

addition booklet

Same concept as his sisters but as he is only starting to work on his addition sums I also included some round sticker dots for each number.  This was so that he could check his answers himself (ie the dots on the one side of the equals sign need to be the same as the number of dots on the other sign of the equals sign.)  With his sticker dots I also organised them in rows of 5 as I wanted to re-enforce the idea that 10 is 2 groups of 5 or that 7 is 5 plus 2 etc. (And for the A6 spiral notebook that I used the rows of 5 also fit in very nicely on the strips of paper.)

Homemade addition bookletVery simple and cheap to make (we bought the A6 notebooks from Tesco for 50p each).  The dot stickers where some that I already had in the house but I have a feeling I also orginally bought them from Tesco at some stage.

Addition booklet to encourage the idea of balancing the sumsAddition and Multiplication flip book.  Great for allowing kids to practice their times table and addition at home

Save

Posted in ks1 maths | Tagged , , , , , , | Leave a comment

Wipe Clean books the ones we have actually used

Since my oldest was young we have had a steady supply of Write and Wipe books (or Wipe Clean books) in the house.  Some were given to us by friends and family and some have been bought by me.  And like with most things we have had some that were just not popular with the kids (or myself) and others that have been a hit.

One issue that I had with the large selection of these book which we ended up having in the house is that they come in a large variety of different writing styles (honestly I never realised how many different ways there are to form the letter f).  My daughter found this very confusing and did not like it.  For her it was very important that all the books that we use for letter formation and basic spelling words where in the exact same writing style that she was learning.  Now as she is older she is not fussed by different styles of writing but around 2 year ago it has a big issue.

So these are the books we actually used and found helpful as part of our home learning.  It is a completely personal list of books, all of which have either been bought by my husband or myself or family members.

The Wipe Clean Work Books: Tracing and Pen Control is what we used before the kids really started forming their letters and numbers.  The beginning few pages have basic lines for the kids to trace over but after you get past those it gets more interesting and it is these pages that my kids tended to do over and over again.

Wipe Clean workbook Tracing and Pen controlMy son has been using his Wipe clean abc On the Move book for a while now and he loves it.  The theme of diggers, trains and planes suits him and he will happily trace over a few pages while his big sister is busy with some of her work.  We bought our copy of this book at a small bookstore and I have never seen it since but I have found the Learn to Write Trains book and the Learn to Write Tractors and Diggers book both of the Miles Kelly Website.

Wipe Clean book abc On the MoveTricky Words (Wipe Clean Workbooks) I actually bought for my daughter around two years ago as she was really battling with her letter formation but was wanting to spell words.  She did not use it for that long but it was a good confidence building book and she quickly moved onto the learn to write the first 100 words with Writing Pen.  Her little brother is currently loving the Tricky word book.

Wipe Clean Tricky Words

The photo below is what the Learn to write the first 100 word book looks like inside.  The letters are a lot smaller than the Tricky word book above.

Learn to write the first 100 words

The one Wipe Clean maths books that we have used is the Wipe Clean: First Sums (Usborne Wipe Clean Books).  It only includes very simple sums but we have used this book to also help with number formation as the kids can trace over the dotted numbers first and then the right answer.

Wipe Clean First Sums

Wipe clean - first sum book

I keep the Write and Wipe books together with the white board marker pens in a draw so the kids can get them when they want.  They have all been very useful books especially when I was starting out on our home education journey and was not too sure where to find all the resources that we now use.

My kids still like the idea of using “magic pens” and wiping them off afterwards but now with my oldest we tend to use our Learning Resources Wipe Clean Pockets and I print off pages for her to do and insert them in the pockets and we have our very own custom make Write and Wipe activity.

And the great thing about the Learning Resources Write and Wipe pockets is you can also use them with play dough and we use are STABILO 3-in-1 pencils on them too.

Write and Wipe clean books we have actually used.  Helps to teach kids how to from their letters, spell basic words and tricky words and some basic sums


I have included affiliate links in the post.  If you follow an affiliate link and go on to purchase that product, I will be paid a very small commission, however your cost will be the same.

Save

Save

Save

Save

Posted in Book Ideas | Tagged , , | 2 Comments

Leaf Identification folder

Identifing a tree based on its leaves ofamilyblog

The past few weeks the kids have been spending a lot of time helping out in the garden and no big surprise with all the help comes lots of questions.  Questions on the plant life cycle, the impact that the insects and birds have on the plants and what the plants in the garden are called.  And I have to confess when it comes to identifying trees I am clueless – except for the Willow tree at the bottom of our garden – that one I know.

So to help the kids (and me), my daughter and I made a leaf identification folder.  Nothing fancy, very simple and made using the FREE leaf identification cards from Twinkl.

I started off by printing the leaf identification cards 6 to a page (the size was based on  what fitted best into the folder that we had).

Then my daughter and I cut them all out.  For each leaf we also cut the names out separately.

I got my daughter to work out how to arrange the cards on the folder before we started sticking everything down (for the purpose of planning her layout she had the leaf names on top of the pictures but the end result has the leaf names underneath the pictures.)

Leaf identification cards - setting them all out before you glue

Then for each leaf we just folded the top of the leaf card slightly and glued this bit and left the rest without glue.  We stuck the name of each leaf under it’s picture.

Leaf identification card

The result being that when you lift the picture of each leaf up you can then read its name.

Leaf identification card folder on ofamilyblog

Identifing a tree based on the shape of its leaves

Once we had finished we just needed to do something for the cover.  My daughters choose one of the FREE tree outline pages (again Twinkl) and we coloured it together – I am trying to help her create a bit of depth in her colouring so we did this together.  Then she cut it and stuck it on our cover.

Leaf Identification folder cover ofamilyblog

Very Simple and we have already used it to figure out what two of the mystery trees in our garden are called.

Leaf identification folder ofamilyblog

Helping Kids identify trees based on the shape of it's leavesIf you like this be sure to check out our other Folder / learning aids here – Folder/ Lapbook Ideas


A Cornish Mum

</p>


Posted in Folders /Lapbooks | Tagged , , , , , , | 10 Comments