

Ever since we started home-educating I have become a collector of note. Lots of goodies are kept just-in-case we might find a use at a later date. My kitchen cupboards are bursting with items rescued from being recycled. One of my favourite items to keep are glass jars – I really like the coffee glass jars (thankfully hubbie goes through coffee at a fairly good rate so we have a few of these lying around) and also mayonnaise glass jars and jam glass jars. After a good soak in some soapy water they really can make a good art project.
And there is nothing that I like more than using recycled goodies to create a work of art that is actually useful. I mean recycling, art and making something useful all in one good, it can not get much better than that. So recycled glass jars – well they are perfect for storage – storing pens and pencils and our art supplies, storing seashells and also for being made into luminaries.
Lately we have added a few new decorated glass jars to our ever-growing collection so I thought I would share some photos of our favourite ones.
Sharpies some Pritt All Purpose Glue and some coloured sand. You can create any pattern or picture that you like. My kids are still getting the hang of it and have stuck to fairly simple patterns.
The kids found it easier to create the pattern with their sharpies first, then add the glue (we used the Pritt All Purpose bottles for this – nice and easy for the kids to handle),
 and then they would add the coloured sand (the sand does create a bit of a mess so it helps to have a tray underneath to collect all the excess grains).
 The coloured sand that we used is from Baker Ross but we have mixed all the colours together to get our “rainbow sand”.


My kids and some of their friends have also recently decorated some of their jars with some decopatch paper and Mod Podge glue. This can be as straightforward as using one type of paper or the kids can also mix up different pieces of paper.


My kids have also decorated a number of different jars with images that we have downloaded from the Twinkl website. This is actually a great cutting activity. We have used a number of the story stone images for this. The jars in the photos below were made using the Minibeast images and the Rainbow fish images (Twinkl platinum).


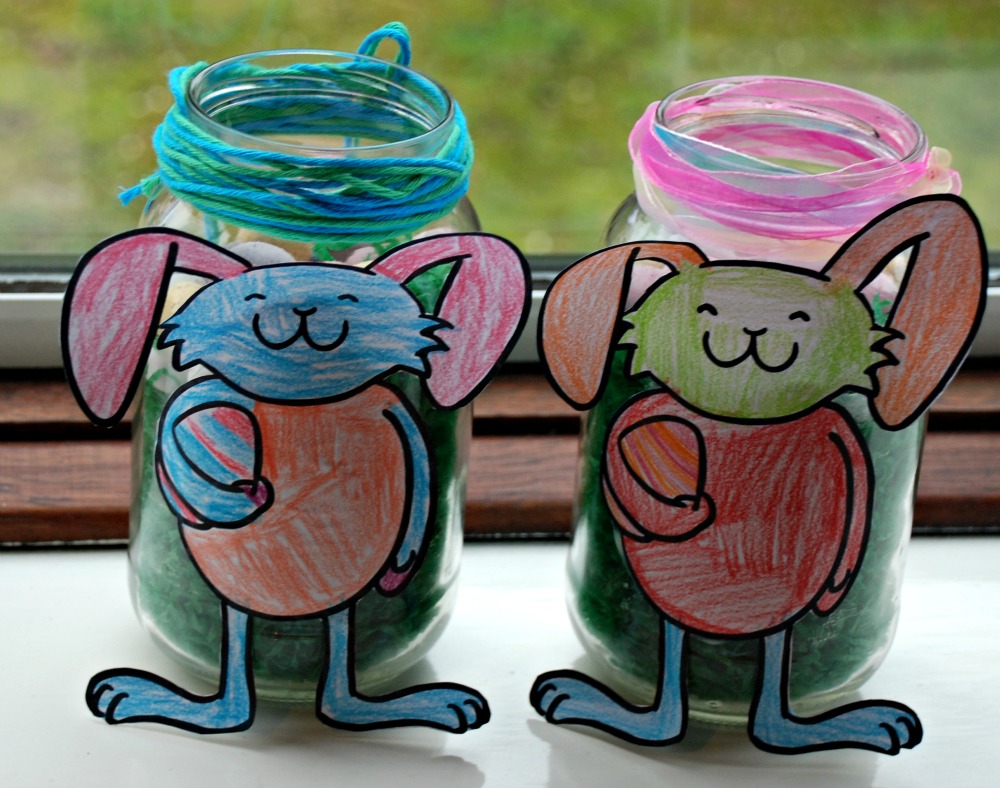
We have also used colouring sheets. A simple outline is the best and after the kids have coloured them in, they cut them out as stick them on the jars – we did this for our Easter Bunny Jars. Very simple and easy to do but also super cute
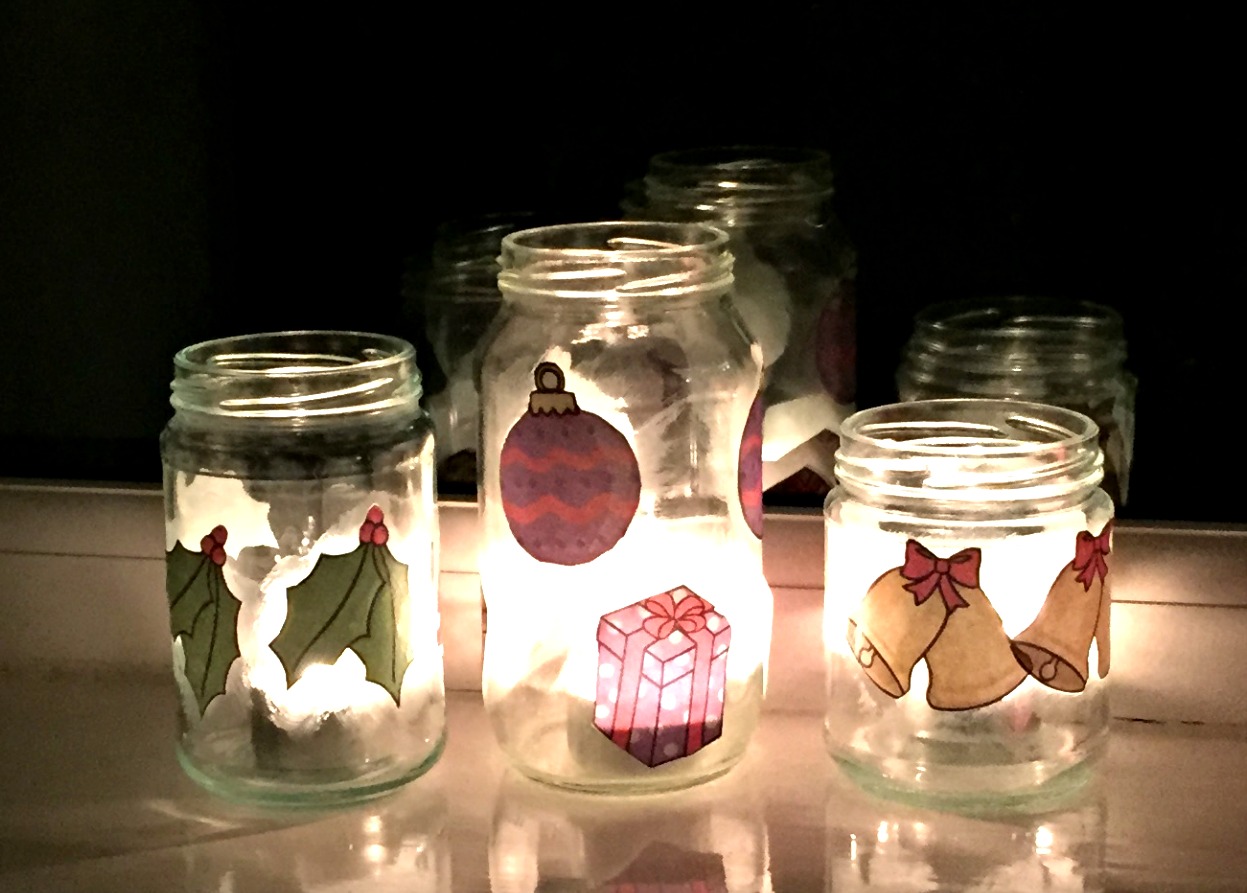
Also small candles inside the bottles can give a very festive feeling. I love the way our Christmas jars turned out.
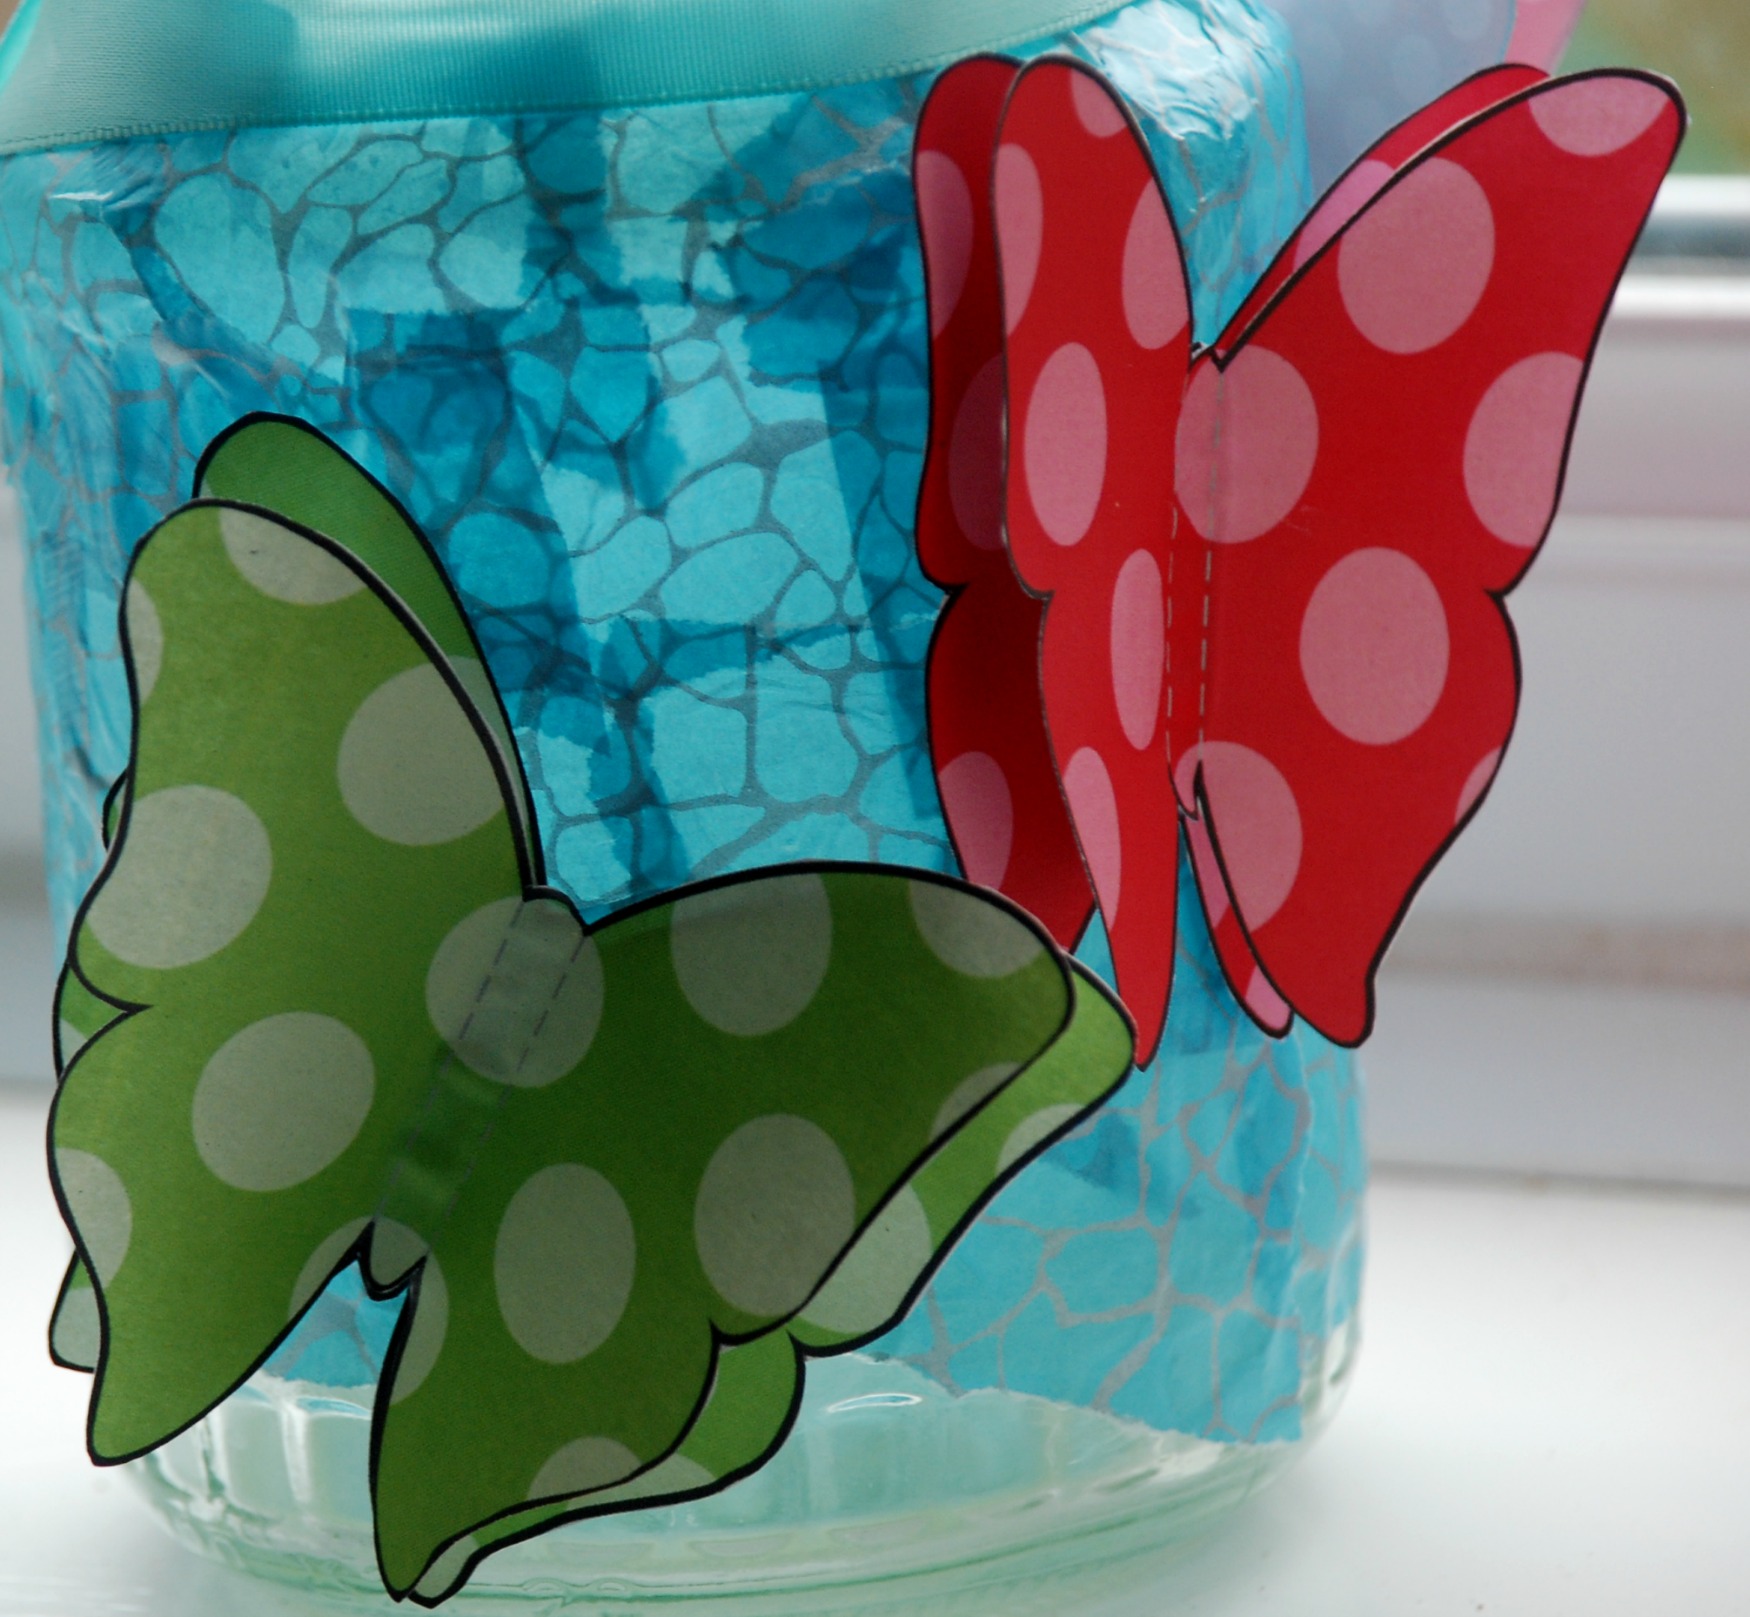
And I cannot do a post about glass jars without sharing our stunning butterfly jars – oh my daughter and I loved this activity (original 3D butterfly post HERE).


These are awesome jars!
LikeLiked by 1 person
Aahh thanks. We love our glass jars
LikeLiked by 1 person